I wanted to make something special for my niece, she was getting married this summer.
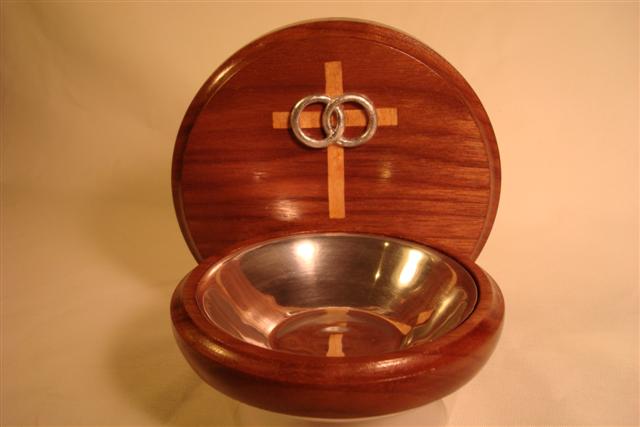
Her and I discussed what kind of project would be appropriate and settled on a Holy Water Font. Turns out it had some very interesting turning challenges.
Modeling
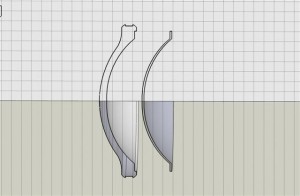
Since the project was a new and complex multi-piece design I decided to model it first with SketchUp. Having a model was also useful because I wanted to get approvals on the design before I set out on such and involved project. The model was invaluable in making templates. I just printed the story stick in full size and then made templates.
See “Woodturning with SketchUp” and my 3D modelling blog on the subject for details on modeling.
The Design
The design required:
- A back with a cross inlay
- Holy water dish and holding ring
- Interwoven silver rings that overlapped a cross inlay.
First I modeled the entire piece to scale. I was glad I did because after the first iteration I realized the piece was to big an overbearing. I reduced its size by 1/3.
I chose to make the water dish from hand spun aluminum which necessitated building a mandrel to precise dimensions, allowing good fit and proportion with the rest of the piece.
I selected Walnut as the main material. The cross was made from figured maple veneer.
The project took nearly 5 calendar months to complete, quite a bit longer than I expected, partly because I needed to finish the mothers day music box first.
The holy water dish
I chose a spun aluminum dish to create a unique and custom touch. I used 6″ AL Circles .040″ thick and spun the disk on my converted lathe. Click here for more on metal spinning. I am not highly skilled at spinning yet so it took two tries.
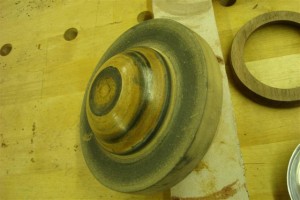
The mandrel was made from laminated MDF for the face and Oak for the threads. It was drilled and tapped to 1″-8 TPI.
The mandrel profile was turned using a pattern made from the 3D model. The the surface of the mandrel was sanded to 600 grit after a few coats of CA. This surface preparation still imprinted into the surface of the disk and it had to be heavily polished to remove the marks.
I’m still working on perfecting wood finishes for spinning wood mandrels, as bare wood will transfer a pattern to the inner surfaces.
Threading Mandrels
Threading wooden mandrels can be made from laminated blanks using conventional taps. I have taps to match both sizes of lathe spindles as well as my OneWay live center adapter they are 1 1/4″-8 TPI, 1″-8 TPI, 3/4″-10 TPI.
Drill the hole in the blank while on the lathe. Then put the tap in the hole and bring the tailstock forward until the tip of the live center mates with the machined hole in the end of the tap.
This will align the tap. Using a wrench patiently rotate the tap while driving the quill forward pushing the tap into the wood. Wax can be used as a lubricant.
The Ring
The ring holding the dish was made from a square piece of walnut. Unfortunately I don’t have many pictures.
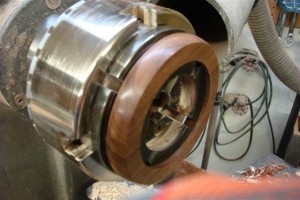
Work-holding the ring was accomplished as follows:
- Hot glue the blank to a faceplate. Make sure there is glue in the areas where the ring will remain.
- Turn and finish the perimeter including all features
- With a parting tool cut out and finish the inner diameter. Careful, only the remaining part of ring is held to the faceplate. With a light touch don’t cut into the faceplate.
Finish the inner perimeter and then remove the ring from the faceplate with a chisel. - Remount the ring on a chuck grabbing the inner perimeter and finish the inner and outer surfaces on the opposite side from before.
The back & cross
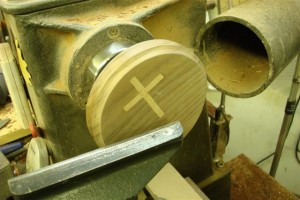
A square blank the size of the back was hot glued to a face plate and it was turned and finished, then sanded flat while on the lathe.
I decided to inlay the cross into a matching piece of walnut veneer. After orienting the inlaid veneer’s grain it was glued to the back. Be careful to get the veneer on the face with the correct rotation so that it doesn’t appear crooked. I did mine twice :(.
The figured maple cross was inlaid by hand using a xacto knife and the “window method”. This was tedious but worked to my satisfaction, I’ll be doing more on “marquetry for woodturning” in some upcoming posts.
Cutting the flat on the ring
So how do you cut a perfect flat on a circle so that it will mate at a perfect right angle to the back?.
Answer: I cut a hole in a piece of squared MDF and glued the ring to it. The hole matched the outer lip on the ring (See design). Then is was a simple matter of putting the substrate on my chop saw and cutting the flat. Before removing the substrate I drilled the dowel holes on the drill press. Using a hand made dowel jig I drilled the matching holes in the back.
The wedding rings & guilding
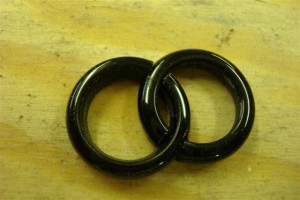
The rings were made from black acrylic pen blank scraps. Each circle was turned and polished on the mini lathe. One ring was laid over the other and they were merged together by alternately cutting away the interposing area of the other. This gave the appearance of them being intertwined.
I used aluminum guilding so the rings would match the dish. This was my first time doing any serious guilding. Not as easy as I imagined…. it never is, right! This craft takes a lot of patience, many coats and a perfectly smooth surface. Every imperfection is highlighted by the guilding.
Hints:Don’t touch the sticky surface before guilding and don’t touch the guilded surface until you have it sealed. Wear guilding gloves and the correct brush. I used the kit from woodcraft. I need more practice guilding, but I’m glad I tried it.
Assembly
The dish ring was doweled and glued to the back. The wedding rings were glued to the back with CA and the disk simply sits in the ring so that it can be removed for cleaning and filling. The wood was finished with Waterlox for durability and waterproofing.
Summary
The holy water font was fun project that called upon multiple disciplines to create a one-of-a-kind peice.
This was my second hybrid wood and metal project, the last was the coffee cup. If you have any questions on the details of the project post comments here or email me.
For more on the 3D modeling of this project go to “Woodturning with SketchUp“
To by the book click here









Pingback: Video Review: Master Techniques of Marquetry | Turned.Out.Right Woodturning Web-shop